Wednesday, August 31, 2011

Prepping for the "Diet"

I made a trip to Walmart to stock up on supplies for my week of eating just candy. Yes, I am actually doing it!! I've committed myself to eating solely candy for a full week starting this Wednesday at 11:59pm going all the way to next Thursday at 12am!
The results of my candy diet shopping spree.
There are a couple somewhat "healthy" ones in there!!
My sister Kylie bought me this grab bag of candy from the
Palmer Candy Shoppe in Sioux City, IA this weekend.
Little did she know it was contributing to my 8 year old dream diet!!
 
Here are my rules:
1. Anything that somebody would look at and say, "Ooh look how yummy that candy looks!" is fair game.


2. Water is obviously allowed. As far as other drinks, I've been known to spruce mine up with candy every now and then (see my Skittles Vodka), so I'm going to allow candy garnished drinks.


3. Each day I will rate my progress: Weight Change, Hunger Level, Candy Love


That's it!! I'm getting pretty excited, and I've even cut back on my average candy consumption for the last few days, 1. because I don't want to get sick of it (like that would happen!!) and 2. because I have been trying to eat all the food in my house that might go bad within the next week.


Matt is quite nervous about my little experiment, he thinks that I will go on a huge sugar high and be lifting up the couch with one hand while vacuuming with the other, then the next minute be either crashing or spending a lot of time in the restroom... I sure hope not!


So here it goes, tomorrow I begin my candy diet! Check in and see the progress! :)


Tuesday, August 23, 2011

Candy for a Week

So I recently "stumbledupon" this blog of a fella who decided it was wise to eat candy for a week.
http://www.stumbleupon.com/su/2lbf1H/www.zug.com/live/86637/My-Week-of-Eating-Nothing-But-Candy.html
I've been debating the pros and cons to this choice, and the more I think about it, the more I would like to try...

I knew I couldn't be just the second, or third, or heck even fourth person to try this. I searched the web a little and came across this book about dieting with candy.
The Candy Diet: Taming the Hunger Monster
Read the review here.
Okay, so this book doesn't tell us to eat candy for EVERY meal for a week as a diet plan. It does tell us that you don't need to completely elimate something as wonderful as candy from your diet totally to live a healthy lifestyle. It's okay to indulge, especially if all you need it just a little piece of candy to curb your hunger until your next meal.

I have to say that I don't have the healthiest of diets to start with, so I can't imagine my body would be that upset with me. I'm thinking I will start next week, (sounds familiar for any diet plan doesn't it!) so please leave suggestions, comments, or questions and maybe even try to talk me out of this...

Friday, August 19, 2011

Candy Buffet

So as I mentioned earlier, I put together a candy bouquet for one of my best friends' wedding. Meghan & Wes had a yellow and gray theme to their wedding that turned out beautiful. Yellow and grey candies however, are a little difficult to find! 

This is the best picture I got :(
I was too busy having an amazing time I guess to get anything better!


When Meghan asked me to put this together, I initially was planning on making all my own candies, but because I was also a bridesmaid in the wedding, and had to travel a day to get to the location, I just thought it was too much work for candies that wouldn't be fresh, so I settled on store bought candies (except the mints of course!)


For those that know me, I am a self-proclaimed rummage sale queen, so every candy dish that I used was a garage sale or thrift store find for under $2. Pretty good huh? :) I just washed them up and decorated them with ribbons to bring the whole color theme together.


For my candies I settled on the following:

  • Lemonade Mike n' Ikes
  • Peachie-Os
  • Lemon Heads
  • Banana Laffy Taffy
  • Mystery Flavor Air Heads
  • Hershey's Kisses
  • Lifesaver Peppermints
  • Swedish Fish
  • Lemon Squiggle Pops
  • Pina Colada Candy Cane sticks
  • Giant Yellow Marshmallows
  • Wedding Theme Conversation Hearts

I purchased all this candy from different places including, Bob's Candy Warehouse in Yankton, Wholesale Supply Co. in Yankton, Walmart, HyVee, and http://www.candywarehouse.com/


I used this image as a theme as well with stickers on favor bags for the guests, and of course a "Love is Sweet" sign. Cute.
The only down-side to a candy buffet is all the leftovers....wait who am I kidding?!? I do have lots of leftover candy, and I did get a little bit of a bellyache when I was "emptying out" my candy dishes, but there really isn't such a thing as too much candy in my house :)
Congrats to the Mr. & Mrs.!!!


Wednesday, August 10, 2011

Wedding Mints

Here's a little preview to what I will be doing this weekend:


If you guessed a wedding-you are right! And really, what is a wedding without cream cheese mints?! I've helped my mom and aunts make these mints for many weddings in our family, so I volunteered this "skill" for one of my best friends' wedding this weekend. I am also providing all the candy for the celebration in the form of a candy buffet. Candy buffets seem to be gaining popularity, so I thought I give it a shot-you can check back to see how that one turned out next week. My cream cheese mints will be making an appearance on the buffet--here's how they are made:
Not the prettiest of pictures, but more will
come after the wedding
Cream Cheese Mint
Softened Cream Cheese
1 - 8oz package cream cheese (room temperature)
1 - 2lb package powdered sugar
1/4 cup granulated sugar
Peppermint flavoring
Food coloring


1. Mix together the cream cheese, flavoring, and powdered sugar, gradually adding the powdered sugar. 


2. Split the mixture into however many colors you would like to make. (I made two) Add the coloring to each and knead it together until color is evenly distributed.
My mint mixtures-yummy?


3. Put sugar in a small bowl. Roll the mixture into a ball and dip it into the granulated sugar. Put sugar side down into mold pressing firmly. Flex mold and release mint.


4. Let air dry 4-6 hours, then layer with wax paper in an airtight container and refrigerate or freeze until enjoying.


Lots-o-mints!
I doubled this recipe and it made roughly 300 mints. To make gray, I simply used 4 drops of black food coloring. Just make sure that you only do one drop at a time so it doesn't get too dark too quickly. For other colors, like yellow, it will take quite a few drops (10-20).
Flexible Rubber Mint Molds - Wedding Style


I found my molds on ebay from this merchant on Ebay: Pat-A-Cake 
Here's a few tips I learned from my mint-making experiences:
  • Twist, shake, & tap the mold to get it out--you'll figure out what way works best for you after a couple pop out.
  • Roses are the most forgiving as far as keeping their shape after you plop them out.
  • Deep molds are the hardest to get out of the mold. Don't be afraid to use lots of granulated sugar, as that is what keeps the mint from sticking to the mold.
  • If you are looking for quantity, leaves are the way to go as they aren't as thick and your mixture will go further. If you want quality-go for the deeper molds.
  • Your mint doesn't have to fill the mold perfectly- if it's not completely full, or a little over-full, just plop it out, and no one will notice. People just like to eat them, not judge them!

This recipe is about as basic as they come, and it's hard to screw up. All you need is a little patience and some table space and you've got yourself some mints! Matt even tried to help me out with this one. His first attempt lasted about 1 minute and resulted in a some sort of squished lump of mint. About ten minutes later he tried again & did manage to get about a dozen mints made before he wandered back to the living room. I guess candy making isn't his forte... I do appreciate that he tried though :)

Thursday, August 4, 2011

X-Rated Kit Kats

I sold my first batch of candy this past week! People, besides me, are actually enjoying my treats :) Back in March, I brought a batch of my Kit-Kat knock-offs (see my "Gimme a Break" blog entry) for Matt and his co-workers, and got asked if I could re-create the candy bars in any other shapes.... I said yes. Then I found out a couple weeks ago what shape my customer had in mind....
slightly embarrassed...
These little treats were for a bachelorette party, hence the shape, and were a big hit! It took my a while to figure out how to get the shaping technique down, but other than that, I followed my previous recipe to a "t" and they were great. I got quite a few giggles out of these, I hope you do too.


I cut them out individually 
Finished Bachelorette Boners
I felt very naughty the whole time when I was making these & debated posting this experience because those of you who know me, know that I am pretty reserved when it comes to things of the "x-rated" nature...so I apologize if this post catches anyone by surprise. But hey, candy is candy, no matter the shape or size ;)

Tuesday, August 2, 2011

American Candy Corn

Yes, this post is a month late. Procrastination I suppose. Anyways I made these America-themed candy corns for the 4th of July picnic that we went to this year. They were a big hit and pretty easy to make if you work quickly enough!


Candy corn is typically associated with Halloween, and National Candy Corn Day is actually on October 30th, but I think it's completely acceptable to have this treat anytime of the year! You could make Indian corn (brown, orange, & white), reindeer corn (red, green, & white), or cupid corn (red, pink, & white), heck, you can make it whatever color you like!!


Candy Corn
(Adapted from the "Field Guide to Candy" by Anita Chu)


2 1/2 cups powdered sugar
1/4 cup dry powdered milk
1/4 teaspoon salt
1 cup sugar
2/3 cup corn syrup
1/3 cup unsalted butter
1 tsp vanilla extract
food coloring (whatever color you desire)


Cookin' it up
1. Combine powdered sugar, powdered milk, and salt in a bowl and set aside.


2. Combine sugar, corn syrup, and butter in a saucepan. Bring to a boil over high heat, stirring constantly. Reduce heat to medium and cook for another 5 minutes, stirring occasionally.


3. Remove from heat and stir in vanilla extract.


4. Add the dry milk mixture to the saucepan, and stir to combine. Let mixture rest for a few minutes until it's cool enough to handle. (But not too long or it will get too hard!)


Candy Corn Ball
5. Divide dough into 3 equal parts and place each portion in a bowl. Add coloring as desired.


6. Knead each portion of dough until the coloring is evenly distributed and the dough is smooth and stiff.


7. Roll each portion into a rope about 1/3 inch thick. Place the three (different colored) ropes of dough next to each other to form a long rectangle. Use a rolling pin to gently press them together.


8. Using a sharp knife or scissors, cut the dough into triangles and place on a baking sheet. Let set for about an hour.


Candy Corn Rope 
This makes about 80 pieces. Store in an airtight container for up to 2 months.


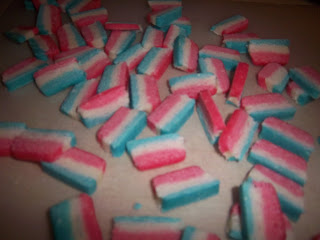
The only tricky part of this recipe is that you must work quickly when forming the ropes and getting them to stick together. Some of my ropes wouldn't stick together because they hardened too quickly and I ended up with candy corns with tips that would fall off. I also made a couple shorter ropes as opposed to one long rope so it was easier to handle. The last rope I really smashed together and then just sliced it like a block of cheese to get some rectangle shaped candy corn with stripes which I thought was appropriate for a red, white, & blue treat!
Candy Corn "Flags"